We're Designers. We like to Decorate, while we Eat Chocolate.
Showing posts with label interior design tips. Show all posts

Thursday, February 12, 2015

Part 1: DIY Wainscoting, Board and Batten in Entryway Foyer

I've had this project in my head for ages.  I knew it would take a long time and so when my hubby had a long trip for work I knew it was just the time to get started.  I wanted to have it all up and done before he got home.  Well,  I may have underestimated the time it was going to take to complete this project- ha!  

(Most of these pics were taken with my iphone. No time to get out the big camera in the midst of this project.)

Step 1:  Order the mdf online at the Home Depot, I love being able to pick it up at the front rather than going to and hauling each piece onto the cart myself.  I used 1x6's for the baseboards and 1x3's for the stiles.  I also got some 1x1 trim pieces for the inside of the boxes.  

Step 2:  Paint all the  primed mdf in the garage.


Step 3: Clean all the junk off your work bench so you can work.

Step 4: Get all 3 kids off to school finally and gather all essential tools:-)


Step 5: Take before shots!

Entryway Before:


Step 6: Use your chisel, putty knife and hammer to carefully take off the existing baseboard, I put this back on at the end to layer on top of the new 1x6 taller baseboards.  Love this look!

Step 6 1/2:  Measure and cut your chair rail and base.  

While I usually describe myself as a delicate flower and am NOT a feminist, I love being able to build things myself.  There's always a learning curve on each project, and after a few past projects  I feel pretty confident with a miter saw.  During this project I finally figured out my air compressor and nail gun.  Don't have to ask the hubby for help anymore:-)

Someone took all the ear and eye protection with him on a trip, (including my Women on Target ears I just got!),  so I was forced to improvise for safety gear.  Enter my  blingy sunglasses, and I found some of my hub's racing headbands to help dull the noisy saw.  Don't forget to pull your hair back too, you don't want that getting stuck in your tools or in the way!


Step 7:   Using your Level, make a line and tack the new chair rail in place, mitering the corners.   Also the baseboard.  Then measure and add the stiles with your nailer.  Don't forget to use your glue too!

Step 8: DESIGN TIP!  Make sure there are always stiles at both ends of the wall!  You don't want a 3 sided box up against your door frame, there needs to be 4 sides of molding and then your door frame, or it will look unfinished.  Same with the corners, make sure there is a stile at the corners.  Don't let the wall corner hang out by itself.


Step 9: Repeat process for each wall.

I'm loving our new hand scraped hardwood floors we got last year... 
I really should have covered them up with some brown paper stuff to avoid getting sawdust in the cracks.  It was a real pain to get out.  I put my air compressor on a piece of cardboard so I didn't scratch the floors.


Step 10: Once boxes are up, go around with your smaller trim and add to the boxes.  This helps hide any gaps between the mdf and the wall not being plumb.    Putty and sand nail holes and joints.  


This takes forever!!


Step 11: If you're running into other existing trim, like up the stairs, use a coping saw to cut the trim away where you need to.  Like on this small piece below.


I'll be back with PART 2 for the final reveal!

Wednesday, August 3, 2011

Everything is Better in Chartreuse

This is only zero dollars because I mixed a bunch of left over paint I had to get these colors.
It all started with this wall being SNNNOOOZZ! Boring! So when I was home alone for the weekend and bored (when the cat is away the mice with play!) my mind stated turning and this slowly developed.
The walls are a nice warm grey, but I kept feeling like it was little drab, and I love greens especially lime and chartreuse, so this really brought a nice life to the room!
I painted the lime green one night, then I still felt like it needed something so the next night I free handed the frame and then painted it a darker shade.

It's such a happy green! I also feel like it kind of defines this t.v. area, since it's just one big Great Room.
p.s. out of all the colors this wall appears to be on this post, this bottom one is the most accurate! :)

Friday, May 20, 2011

His and Hers Office

This is our actual working office/sewingroom/craftroom/library/studyhall so it may not be perfect, but it's at least organized (don't open the closet door) and I love organization that can last more than a day! Oh and I'm sharing it with a man so it's really the best I can do. ;)

So speaking of sharing, for our "His and Her's" Office Space I wanted to represent us both. So after some thought I knew that I loved Neoclassical design, he also loves U.S. history (same time period) and we both like modern clean furnitures so I went something a little like this....


But first.
-The desk is a life savor! I love that each of us has a place to work.


-The chairs are also from IKEA and I added the "his" and "hers" to the back.


Above on the wall is a glass board (IKEA) that I use as a whipe board and calender. It's great!
-


There are also boards above each of our work space were we can tack things.
I've put up there places we've been and places we want to go, and projects I'm working on.


And no work space would be complete without baskets with cute chalk board labels.
We already had these 2 shelves so we put one on each side of the table to create our own "unit"

I just fell in love with this bunting when I saw it on Whipperberry.com and knew I wanted to make it (see below). I think it incorperates a hint of Neoclassical inspiration without going overboard


(dining room, Mt. Vernon)

Some of my inspiration the color of room and the bunting came from Mt. Vernon, MD. George Washington's home. We went there last fall and I fell in love with it because each room is painted an amazing shade of blue or green.
I have a feeling Martha W. and I would have been great friends.
So again, the use Neoclassical style and US History, combining 2 things we love!


I also love the raw fabics since I love to sew.
How-to: Take one Lloonngg piece of fabric the length of the what you want and then tie other scraps of fabric to it. I stuck with cream, whites, blues and greens.


Neoclassical wouldn't be complete without a couple of Busts!
The man and woman I found at the thrift store work great in my His and Her office.
Neoclassical also has a profound use of Symmetry
(notice the picture of the dining room above also). I also have a profound LOVE of Symmetry. I was inspired by that for our little reading/studying nook below.
And the desk area above is also rockin' the symmetry.


We love to sit here and read or study. To see how I did this wall, go HERE.
(I promise those lights are at the same height but for some reason it doesn't look that way in the picture)


This is also a little Ode to Neo C. a table with a little fluted column.


Notice when I talk about this room I say "inspired", not reproduced. I wouldn't say the room is Neoclassical, but was more or less influenced

My suggestion for doing a His/Hers space is to make a list for each of you with everything that you love- to do, colors, style, jobs, hobbies or whatever until you see common thread. Shouldn't be to hards since you're married right? You should have something in common! Once you find that thing run with it! But try to do it in a more subtle or fun way.

Oh and more Neoclassical, just because I can.

Friday, April 15, 2011

Part II. Suitcases


This is part II of my suitcases, go HERE to see part one!
The labels on my suitcases are done! It didn't take me long, but like with most things I got distracted. Plus it's been so nice outside I haven't really wanted to blog. I got my first sunburn today!


So I guess working my way down from the top. On my lables I found these cute frames that already had pictures in them and were sticky on the back. So basically a sticker, but they're so much more than that! Look how cute. I don't scrap book but sometimes I wish I did because some of the stuff is so cute. Anyway, I digress! I used the "sticker" that had a picture of an old phonograph and the letters "C" and "V". This one holds CD's and VHS, stuff I don't want to quite give up yet!
Oh and I finally finished putting the vinyl on the black one. Here it is! Honestly, I would use it on my next trip. But then of course I would probably ruin it,so it's quite the conundrum.


The red one is also a favorite. I decopodged it with paper, if you haven't checked out the other post yet.
The "P" is for Photographs. Mostly duplicates, but don't worry, I have also burned them onto C.D's and in my firesafe. Tip of the day!

The "T" is for Toys.


This is a man's briefcase that I decopodge on this awesome paper, it kind of has a sketchbook/college fill to it.


It holds old magazines that have so much good stuff I can't bring myself to rip apart just yet!

The "Yellow" one that I painted has a "D" for dress-up.

The teal one holds our old Yearbooks....awh memories.
This footlocker my husband's Grandpa took to WWII, now holds Quilts. "Q"!

So there you go! Basically old stuff holding more old stuff.


Visit thecsiproject.com

Thursday, April 7, 2011

Non-permanent Kitchen Backsplash


BEFORE
This is the kitchen back splash in that house we're "renting" (I use the term "renting" loosely since it's actually my parents second home that we're living in while my husband finishes school)
So I'm not saying that I don't like this BUT one thing you may not know about is that I'm a BIG tile nerd! And since I have access to something more fun tile I just had to do it.

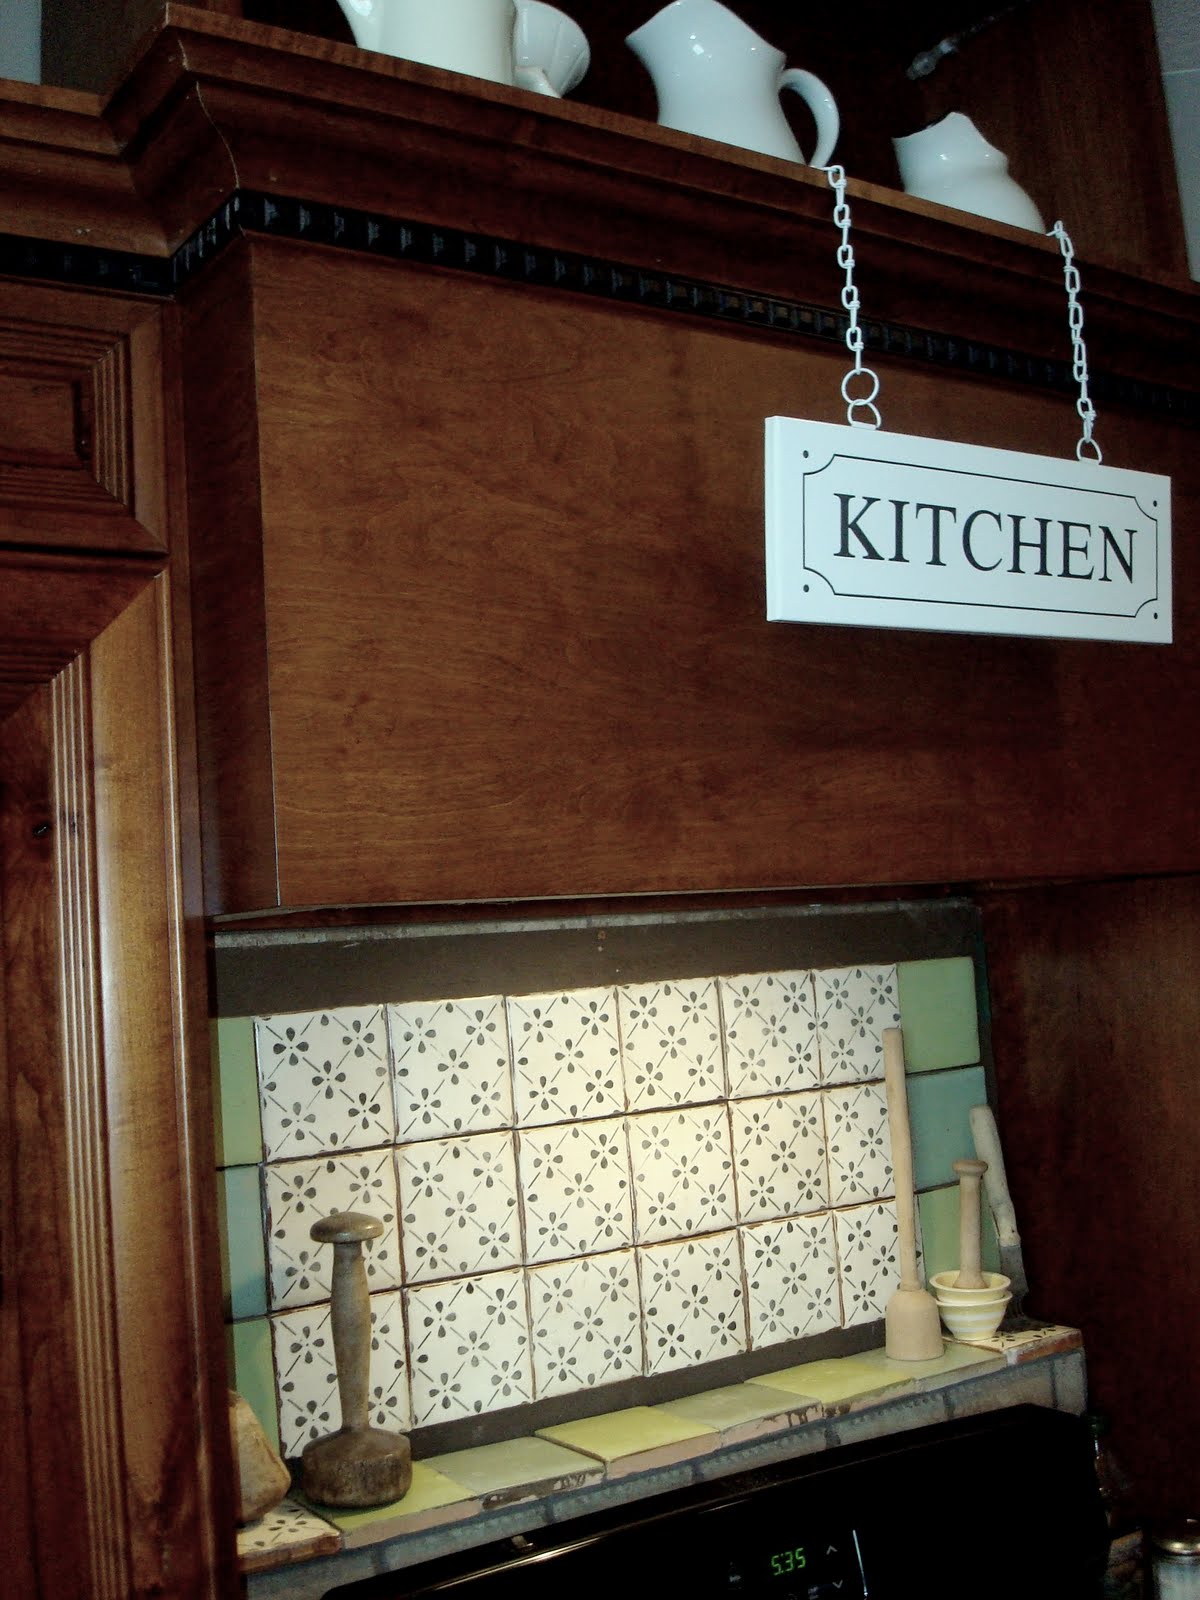
I found this board for only Uno dollar at The Home Depot and had them cut it to fit the size.

Painted brown.


My beautiful, amazing, adorable, totally in love with, tile from Walker Zanger. Are you familiar with Walker Zanger? They have the most amazing tile in the world. You can check out their website HERE. The tile I used if from their hand-made Contessa Line.

(I also saw this tile used in the movie Julie and Julia in Julia Child's kitchen in France that kind of sealed the deal)

I siliconed them to the board, with just 4 little simple dots of silicon so I can take them off, semi-easily if I want ( I hope! )


It was so easy and so fast! I love it!

And... then I needed to hang this Kitchen sign I thought over the hood would be perfect.

I was going to hang it with ribbon but the Industrial Chic'sta in me thought chain would be so much more cuter. I got this chain at Home Depot for .63 cents.


I attached the chain with binder rings.


Ta-da!
I accessorised with vintage potato smashers I collected over the years.
Links

Join  us Saturdays at tatertotsandjello.com for the weekend wrap   up           party!
The DIY Show Off
Related Posts Plugin for WordPress, Blogger...