We're Designers. We like to Decorate, while we Eat Chocolate.
Showing posts with label towels. Show all posts

Monday, May 23, 2011

Bathroom Makeover - In progress

  My DIY towels now have a place to hang out.  I finally ventured into Urban Outfitters and found this great hook for $5 on clearance (that was an interesting place to shop, if you don't mind products cursing at you:-))  I really like using items other than the regular old towel ring for my hand towels, see my 1/2 bath makeover here.

Here's the boys' towels:  Also embellished with napkins I found on clearance at Steinmart.  They coordinate with my daughters yellow towel but aren't too girly.  I plan on hanging them somewhere else, but for now they are on the shower door until I get/make a shower curtain I like.


Next is a small pic of the bead board we installed around the room...


(photo crooked, level on actual wall) 

... I mean beadboard wallpaper!  We used a baseboard to trim it out on top (installed upside-down so I could have a flat part on the top, if I decide I want to add a small shelf later).  This was my first experience with wallpaper, luckily my awesome step-dad knows how to do everything and helped me hang it.  It was only $20/roll at Lowes, and it took just a little more than 1 roll for this average size bath.  The wallpaper is paintable, so I painted it and the "chair rail" to match the existing trim.  

You can also see it in the first photo in the mirror reflection.  I installed it at about 48 inches or so, I like it high, since I'm kinda short (5'3" on a good day).  

Not sure of the wall color, it was here when we moved in.  
 This frame I made for the room hasn't been installed on the mirror yet.


  We are thinking about replacing the vanity top and will have to do that first so we don't risk messing up the frame.

SOO much more to do in this room, baby steps!:-)

Monday, May 9, 2011

Made for Mothers (Another great Handmade Towel Tutorial)

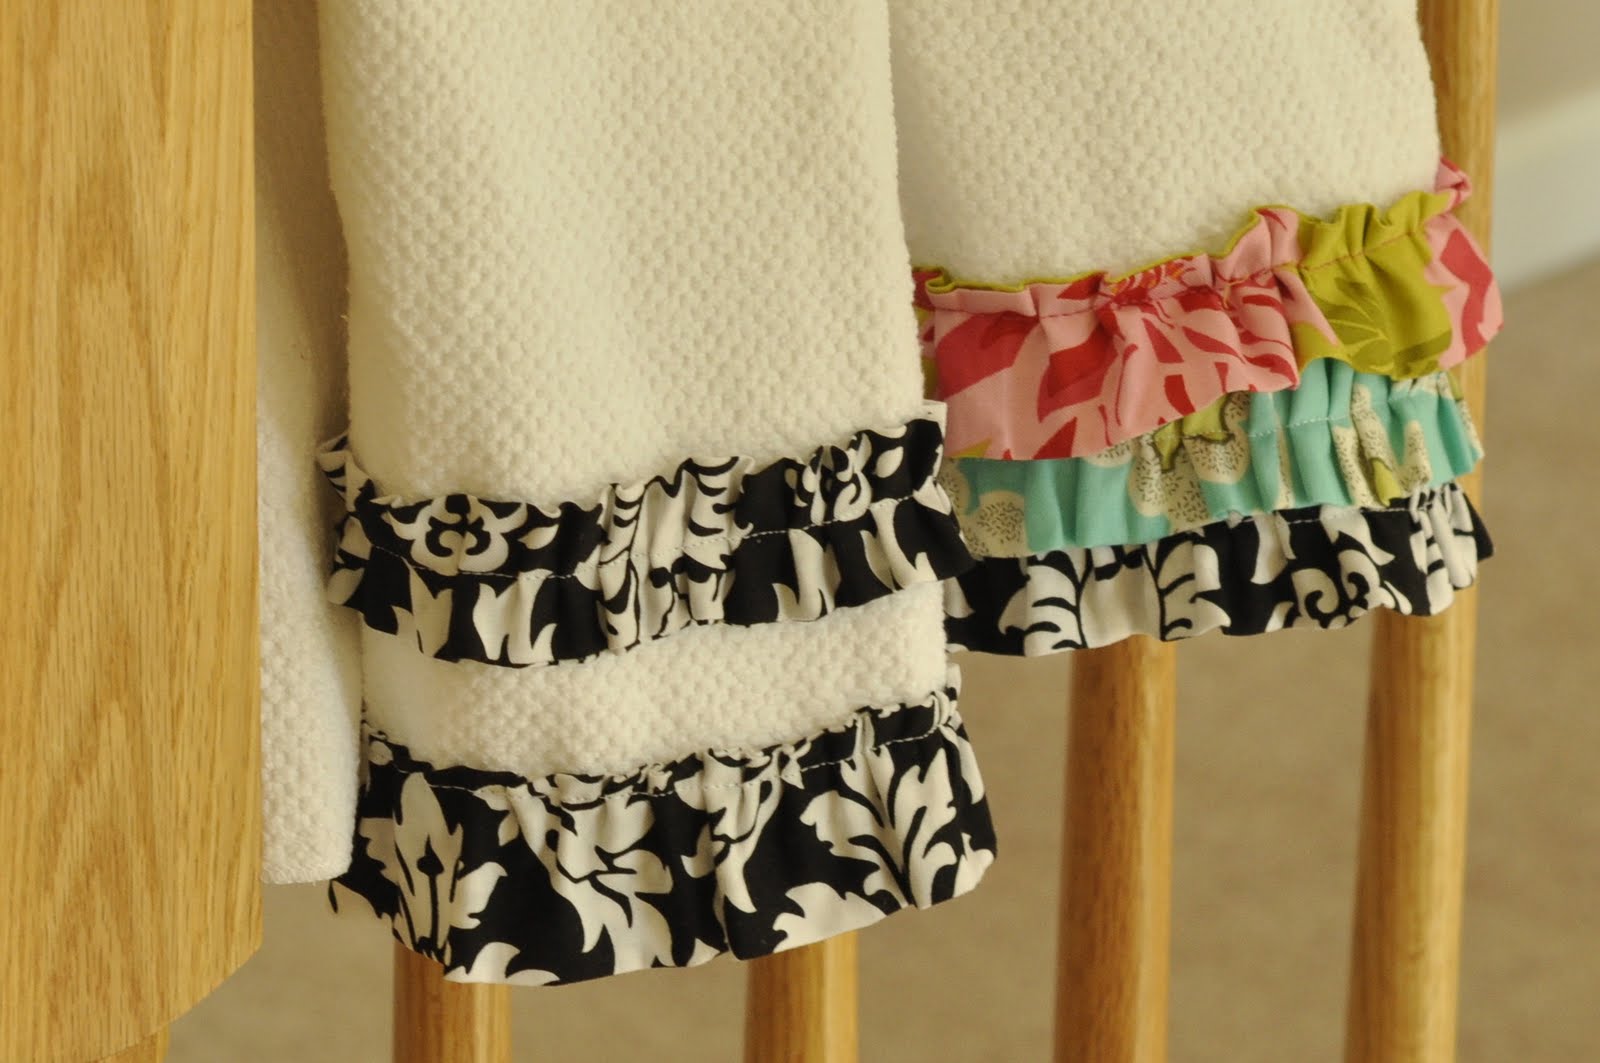
 I was excited to send some handmade items off for Mother's Day gifts this year.  This was a pretty basic sewing project.  I bought some white hand towels at Wally-world, then made  ruffles and sewed them on.    

Here's a VERY brief tutorial on my process, if you have questions, please leave me a comment.

Supplies:
dish towels
Two or three 3-3 1/2 "x36" strips of fabric (or 3"x whatever the widtch of the fabric is that comes off the bolt) for each towel
coordinating thread and white thread on the bobbin (important so you don't have thread lines on your backside, well, the towels backside I mean)
iron & ironing board


1. Cut out strips.
2.  Iron in half lengthwise, wrong side out.
3. Sew one end and then all the way down the long side, leaving other end open.
4.  Turn fabric strip right side out (reminds me of turning out a scrunchie-- remember those?)

5.  Iron strip now turned right side out flat.
6. Pinch and pin the strip on, ruffle to taste:-)
7.  For the top ruffle I sewed it down the middle, for the bottom ruffle I sewed it on the top, so the ruffle would be hanging off the towel.
TIPster:I liked doing the strips inside out first and then turning them, so that after the towels are laundered you won't have any hems showing later.  (I mean really, who is going to iron towels after they're washed?)  Also, I usually had to cut off some of the fabric strip after I ruffled it since my strip was too long,   so then I turned the edge inside itself, and then sewed it in place, that way their won't be a hem on the side either.   (Sorry about the lack of pics describing this, I had to mail them off quickly, and am late mailing off my last set.    

Hope you all had a wonderful Mother's Day!  I sure did:-)

Tuesday, May 3, 2011

A Tale of Towels


One of my on-going projects is the kids bathroom. I've been on the hunt for a vintage style yellow floral shower curtain for the tub/shower, instead I found these great floral napkins at Steinmart.  They were on clearance and the perfect color and pattern.

AND...

Some cute monogrammed towels, for $15 for a set of 3!  I dug around a bit and was able to grab a set for each of my kids with their initial.  
 
And then I got busy! I cut strips, different widths for each size towel, so the fabric would be the right scale for the towels.


Then I hemmed the cut edges, and sewed them hanging off of the bottom of the towel.  I would have sewn them higher, but I wanted to leave some space between the monogram and the fabric.  (my kids aren't picky:-)

I thought this brown ribbon that I ruffled trimmed it off nicely,  however, if added there would be more brown than what I had in mind for the room.   (Veering from your original color scheme is a common mistake- so BeWaRe!:-))


So I opted not to use the ribbon, and instead am going to be looking for a different color, more of a blush or aqua to stick to my color palette.   
These yellow towels are for my daughter, I got some coordinating but not too girly stuff for my boys. --That'll be up next!
Related Posts Plugin for WordPress, Blogger...