We're Designers. We like to Decorate, while we Eat Chocolate.
Showing posts with label Before and After. Show all posts

Tuesday, September 1, 2015

Family Room Before and After 2008-2015

I was digging through the archives from 2008 to find a true before picture of my family room.  We had just moved in, and plopped down our old stand alone TV, Ikea shelves for kids toys and threw up a Christmas tree.  I wasn't a fan of the previous owners green paint colors, but lived with them for much too long.


It took me FOR-EV-ER (insert Sandlot kid here:-)) to decide what to do with this space.... and it wasn't until after I redid my front room in Navy and bright pink (and my husband was ok with it--phew)  that I felt confident I could pull off some pink in the family room as well:-)


Sometimes when its hard to pick a color scheme, the fall back is really quite obvious---- choose your favorite colors!!! You already know you love them.  The key to not making this room look dark or dreary or cray cray, is by using the colors in small doses and having correct scale patterns.   I can't believe it took me so long to fix up this room, since it's the one we're in 99% percent of the time.

I have to include this next pic so you can see my Ikea curtains that I stenciled in coral. I looked everywhere for fabric but couldn't find the look I was going for so I made my own:-)  And it's not a great picture but the kitchen light fixture also got replaced (overstock), and it looks 10x better in person!


More things to still tweak/update:

New side tables by sofa and chair.
Throw away love seat and get new chaise or spindle chair.
Get Rug & new carpet.
Address right side of fireplace.
Floor lamp by chair.
Address TV wall (yes I'm a fru-gal, no cable just bunny ears;)

Kitchen still needs major updating but I'm not dwelling on it.

I'm working on my master bathroom decorating as soon as I finish the new roman shade I re-did in my kitchen.  So glad kids are back to school so I have un-interrupted time to work on my projects!

Happy decorating!
Lauren

Wednesday, April 25, 2012

Check Off the Bathroom Mirror Project!

Lucky for me this week my mom was in town and so I was able to get some projects done!

Mirror Before:

 Step 1: Cut frame yourself:-)


 Step 2: Pick out a color and paint it before your husbee gets home and has an opinion.

You will see the top edges of the moulding in the mirror reflection of the inside of your frame, so you have to paint an inch or two of the backside.


Step 3:  Install it using 3m sticky velcro thingys right to the mirror.


Step 4:  Sit back and enjoy how you took that boring builder mirror to a bright sunshiny day!
I took my towel to the paint store and found a sample to match.  (The color isn't showing up just right on the monitor, but in real life I assure you is the same as the towel.) If I remember correctly, I think the moulding was around $60 for this project, but you could definitely use smaller molding or make your own for less $.
Here's the another view of the room.

Monday, March 26, 2012

Drab to Fab My DIY Kitchen Makeover

I keep bumping into my kitchen island, which sometimes feels like an obstacle course to get around.  I am reminded of my old kitchen that I loved, which wasn't huge, but well space planned.  It had a great big peninsula, and makes me wish I could remodel my entire kitchen.   (I love islands, but it is annoying to me in my particular floor plan.) I decided to revisit my old house's kitchen makeover and reminisce about making cookies on the 4' wide peninsula.

BEFORE:
   This before photo was taken before we bought the house.  I LOVED the peninsula and am sad at my new house I have to keep my black bar stools in the basement... maybe they can come out someday... Anyhoo, here's the "before" and "after" kitchen pics of our house in Utah.
AFTER:

This kitchen desperately needed help, and we did it on a pretty small budget. The cabinets were OK,  and new ones weren't in the budget, the old laminate counter top had lots of bubbles and cracks in it.   I kept things pretty neutral since I knew we wouldn't be staying too long and wanted to make it buyer friendly.  Enter granite tile, travertine trim for the edges, and tumbled travertine for the back splash, and a  new light fixture for the dining area.  After a lot of hard work, washing dishes in the bathroom, and eating a lot of take out, it was finally done.

We also got new hardware for the cabinets, a new faucet and stainless appliances to match the dishwasher, new light fixtures in the kitchen and dining. Hopefully the next owner is appreciating our hard work:-)


We got a new gas stove and refrigerator at the scratch'n'dent store, (you can't even tell) to match our stainless dishwasher.  The appliances stayed when we moved, especially after we completely squeezed the fridge in there, there's no way it was coming out- I miss you stainless appliances-- and penny the peninsula!!!

Monday, March 19, 2012

Bathroom Before & After

 I want to share some small and simple changes that can easily affect the feeling of your powder room.

 Boring Bathroom Before:

After:


Tip #1:  Raise the Rod!  Raising the rod adds height to your room.  I raised the curtain rod about a foot  and I really like that it's off the floor-- I feel its more sanitary since this 3 kids are sharing this bathroom.
(Amy Butler Shower curtain from BB&B)


Tip #2- Update the towels!!!  Surprise, these pretty patterned towels are from Wallyworld!! Yes, you heard me right.  (Even I get surprised sometimes!) They were part of the Better Homes and Garden collection and I love the pattern.  I was almost going to splurge on some yellow ones from Anthro, and scored these wallet-friendly ones instead:-)

(Please excuse the dark pic,  this was the best one to show the beadboard)

TIP #3- FAKE IT! I used Bead Board Wallpaper instead of the real thing and that saved me a lot of $ and labor!  It was super easy to install, and it looks as good as the real bead board on the back of my lockers.  It was only $20/roll and I only used 1 and a half rolls (anyone need half a roll?:-))
The wallpaper is paintable, so we painted it to match the existing trim and tacked on a small chair rail on top.


Before:


After:

(need some vinyl for my bucket--Haley:-))

TIP #4-- Don't match everything!  This goes for all rooms in the house:-)  I got the rug on the clearance aisle of BB&B (first photo). It was from a different collection, but was in the same color family and style I was going for.  I bought 2 of them (I would have got 3 and taped them together on the bottom if they had 3 to make my own runner) but my 2 year old might have just had an accident on one of them before these pics--TMI, sorry!!:))
.


TIP#5:  Make Your Own Art!  I save a ton of quotes and things on my pinterest boards, and so I took a few of the sayings and put them together in photoshop, and printed them in colors that would coordinate with my room.  It's easier than driving to TJ's HG's to search through all kinds of random artwork.  I was able to this quickly and inexpensively with only a few mouse clicks and a trip to the costco photo center.


That being said, I did buy the canvas over the throne at HG's (which I still love to shop at). But I still had 3 other walls to fill and I didn't want more of the same printed generic florals on each one.    I will be framing my sayings as soon as I can get to IKEA for some cheap 11x14 frames.

The only thing left is this:

Yes.  This frame I cut and painted myself over a year ago that I still haven't put around my bathroom mirror!  I was waiting to get new countertops in there too-- who knows when or if that will ever happen.

UPDATED 4/26/12
Sham--wow!!  :)
Anyhoo,  hope that gives you a few ways to spruce up YOUR powder room.
Thanks for stopping by!


Tuesday, March 6, 2012

Roman Shades from Big Blinds

My dining room transformation is moving a long.  My latest project was making these roman shades using my blinds.   I have to admit, when I first started cutting the strings for this I was worried!! Once you start there is no turning back.  I felt the pressure of getting it done before my husband came home and saw everything dismantled:)

****Edited to add: The fabric I used was Windsor from Lewis and Sheron Textiles.

Here's the window BEFORE: excuse the crummy pic of the ghetto room!


AFTER:

I followed this tutorial for shades our of mini blinds, but used my larger blinds.

First I removed my blinds from the window.  I cut all the little slits and took off the bottom, and removed the extra slats that I didn't need.  (leaving intact the pull string--don't cut that one!)

 Second, I rethreaded the slats that I needed.  I put one about every 8-9 inches.

Then I lined up my fabric, left 3" on each side of the slats, then glued each slat down on the fabric with a little bead of FabriTac glue from Micheals.  Then I folded the edges over and glued them onto the slats.

After I put it up on the window, I decided to add some lining to the shade.
So I cut out lining pieces and glued the rectangles onto the fabric in between the slats.  It would be better to do this first, before you glued any slats on.  Oh well.

I also left about 6 inches on the bottom of the shade, and then I just hemmed it by folding it over and gluing it into place.  

Then I hung it back up into the existing hardware. 

Drumroll please....!

(please ignore the wall color--that will be attacked shortly:))

Woila!

And it goes up and down just like the blinds did.  I love it.
Thanks for stopping by!

Update:  On my second shade I glued the slats to the lining first, and then laid that on top of my fabric and glued the lining to the fabric in the same place the slats were laying.   I think it turned out even nicer:-)

Friday, August 12, 2011

Guest Room Cozy-- Visitors Welcome!

Here was the beginning of my guest room.

 Here it is this now.  

The bed frame is from Ikea.  Hydrangeas from my side yard.  Euro Pillows from Target.
Bird Pillow from steinmart. 
 Frame is Laura Ashley, needs to be filled.
Lamp was from Marshall's.
The side table is an ikea table with some fabric thrown over the top. 
  It serves as the guest/craft/mom's time out room.  I go in here and lock the door to take a break from the 3 kids when I need it.:-)

Wednesday, July 6, 2011

Bubble-gum Table


(Pots of lettuce, carrots, and mums)

Somehow I managed to find 15 minutes after spreading mulch and the kids were all occupied with naps or at the neighbors to quickly squeeze in a little spray painting.  

Table BEFORE:

(See how I made this lampshade here)

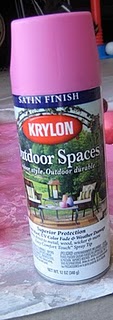
  I used the same Krylon Bubble-Gum paint that I used for my christmas ornaments  (I got this table forever ago at Michael's for  $10).  
The table was weathered, but brought back to life with this fun pink.

Yay for quick projects.

Thursday, May 26, 2011

Petal Lamp Shade Tutorial

I realized I never shared my tutorial on how I made this Petal lampshade.


So here it goes!

I started with this lamp that has an accordion lampshade.


And would you know the accordion part pulls right off!

It was looking yellow underneath, but covered up fine with some white fabric.

I cut strips of white fabric about 2-3" inches wide. The longer you cut your strips the better.

Then I folded it up like paper dolls, and cut a petal shape.
It will look like this when you un-fold it.


I used hot glue and began glueing them on, I would pinch in the middle of the petals to give it some dimension.

Keep going...and going....


And going more the next day when it's daylight:-)


And finally, you're finished! It actually looks great on the original base too, but sometimes I like it on my thrifty spray painted lamp base.


This was so easy and a fun way to makeover an old lamp. I'd love to hear about any lamp redos you've taken on! Thanks for stopping by!!


Monday, May 23, 2011

Bathroom Makeover - In progress

  My DIY towels now have a place to hang out.  I finally ventured into Urban Outfitters and found this great hook for $5 on clearance (that was an interesting place to shop, if you don't mind products cursing at you:-))  I really like using items other than the regular old towel ring for my hand towels, see my 1/2 bath makeover here.

Here's the boys' towels:  Also embellished with napkins I found on clearance at Steinmart.  They coordinate with my daughters yellow towel but aren't too girly.  I plan on hanging them somewhere else, but for now they are on the shower door until I get/make a shower curtain I like.


Next is a small pic of the bead board we installed around the room...


(photo crooked, level on actual wall) 

... I mean beadboard wallpaper!  We used a baseboard to trim it out on top (installed upside-down so I could have a flat part on the top, if I decide I want to add a small shelf later).  This was my first experience with wallpaper, luckily my awesome step-dad knows how to do everything and helped me hang it.  It was only $20/roll at Lowes, and it took just a little more than 1 roll for this average size bath.  The wallpaper is paintable, so I painted it and the "chair rail" to match the existing trim.  

You can also see it in the first photo in the mirror reflection.  I installed it at about 48 inches or so, I like it high, since I'm kinda short (5'3" on a good day).  

Not sure of the wall color, it was here when we moved in.  
 This frame I made for the room hasn't been installed on the mirror yet.


  We are thinking about replacing the vanity top and will have to do that first so we don't risk messing up the frame.

SOO much more to do in this room, baby steps!:-)

Related Posts Plugin for WordPress, Blogger...