DIY Door Knob Picture Hangers

I was wanting to add some more family pictures to my door that hangs on the wall, down the hall. Go HERE to see older Door on the Wall post.
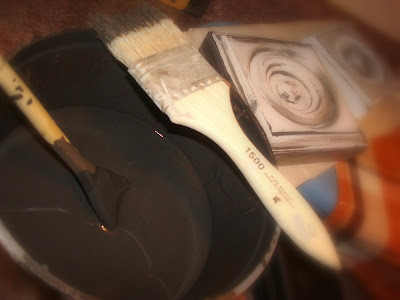
 I bought these at Home Depot in their molding department, by the fireplace mantel kits. I spray painted them white. I can't remember what they're called. Anyone?
 I got a 5" sq and a 3"sq.
 Then I glazed them black.
 Next I added this picture claw to the back. These are found in any picture hanging kit. I mentioned before you can get them at Dollar Tree or Walmart.
 Next I screwed in the knob. These knobs I got at Hobby Lobby. The trick is to take a screw driver and drill a hole in the middle of the square but try not to go all the way through. Then just screw in the knob. It obviously did not screw all the way in but I didn't want it to.....
 Then I hung it on the wall! So easy (but use good screws into anchors on your wall because between the wood, the knob and picture it's quite heavy).
 So where the exposed screw is is the fabric the hangs the picture sits.
 I took picture frames I already had and I hot glued some drop cloth on the backs and then just tied at the top.
 Ta-Da! This frame is also hung on the same way but farther down and on a different wall. So there would be some sort of unity to the madness!
 Then I glazed them black.
 Next I added this picture claw to the back. These are found in any picture hanging kit. I mentioned before you can get them at Dollar Tree or Walmart.
 Next I screwed in the knob. These knobs I got at Hobby Lobby. The trick is to take a screw driver and drill a hole in the middle of the square but try not to go all the way through. Then just screw in the knob. It obviously did not screw all the way in but I didn't want it to.....
 Then I hung it on the wall! So easy (but use good screws into anchors on your wall because between the wood, the knob and picture it's quite heavy).
 So where the exposed screw is is the fabric the hangs the picture sits.
 I took picture frames I already had and I hot glued some drop cloth on the backs and then just tied at the top.
 Ta-Da! This frame is also hung on the same way but farther down and on a different wall. So there would be some sort of unity to the madness!
 Stacey
p.s. the window at the bottom is no longer there. Last min. changes you know how it is!

I was going to do this to some old ban wood. Love it!
ReplyDeletedreaming-n-color.bloodspot.com
wow stacey, those are so cool! you are so creative and talented!
ReplyDeleteVery cute! What book what were you reading?
ReplyDeleteGreat post. Great blog. Just wanted to say thank you for being my 100th follower. Still pinching myself...didn't think I'd ever get there.
ReplyDeleteHave a great weekend...know I will.
WOW !! very creative and very savvy ..... I too am reading a lot these days .....The Amost Moon by Alice Seibold .....Good book .... well really nice to be here and to see such talent !
ReplyDeleteI so LOVE this "cool" idea!!! I’m having a giveaway...be sure to come by and check it out…it starts Monday March 7.
ReplyDeleteBlessings,
Linda
I love, love, love this!
ReplyDeletehttp://lanis-hammertime.blogspot.com/
This is so darling! Great job :)
ReplyDeleteI love it, Stacey. So pretty and functional! Great job! Thank you SO much for sharing your creativity in the DIY Project Parade! ;)
ReplyDeleteHave a wonderful week, ladies!
Roeshel