We're Designers. We like to Decorate, while we Eat Chocolate.

Tuesday, May 31, 2011

Mod Beds

Nothing makes me all warm and cozy than a beautifully made bed.  If you haven't been converted to making your bed every day I highly encourage it!
[ Please excuse my daughter modeling by all the beds, gotta love 3 year olds.]
 I love the fresh color!


And for our male readers...*wink*  I loved the elegance of this room.


Photos taken at the Logan Parade of Homes 2008.

Monday, May 30, 2011

Happy Memorial Day!

Hope you are having a fantastic Memorial Day!  I am so thankful for all those who have sacrificed for our country.  We'll be off BBQing in the backyard with friends and turning on the sprinkler for the kids-- it's supposed to be 90!  We'll be back tomorrow:-)

Thursday, May 26, 2011

Petal Lamp Shade Tutorial

I realized I never shared my tutorial on how I made this Petal lampshade.


So here it goes!

I started with this lamp that has an accordion lampshade.


And would you know the accordion part pulls right off!

It was looking yellow underneath, but covered up fine with some white fabric.

I cut strips of white fabric about 2-3" inches wide. The longer you cut your strips the better.

Then I folded it up like paper dolls, and cut a petal shape.
It will look like this when you un-fold it.


I used hot glue and began glueing them on, I would pinch in the middle of the petals to give it some dimension.

Keep going...and going....


And going more the next day when it's daylight:-)


And finally, you're finished! It actually looks great on the original base too, but sometimes I like it on my thrifty spray painted lamp base.


This was so easy and a fun way to makeover an old lamp. I'd love to hear about any lamp redos you've taken on! Thanks for stopping by!!


Monday, May 23, 2011

Bathroom Makeover - In progress

  My DIY towels now have a place to hang out.  I finally ventured into Urban Outfitters and found this great hook for $5 on clearance (that was an interesting place to shop, if you don't mind products cursing at you:-))  I really like using items other than the regular old towel ring for my hand towels, see my 1/2 bath makeover here.

Here's the boys' towels:  Also embellished with napkins I found on clearance at Steinmart.  They coordinate with my daughters yellow towel but aren't too girly.  I plan on hanging them somewhere else, but for now they are on the shower door until I get/make a shower curtain I like.


Next is a small pic of the bead board we installed around the room...


(photo crooked, level on actual wall) 

... I mean beadboard wallpaper!  We used a baseboard to trim it out on top (installed upside-down so I could have a flat part on the top, if I decide I want to add a small shelf later).  This was my first experience with wallpaper, luckily my awesome step-dad knows how to do everything and helped me hang it.  It was only $20/roll at Lowes, and it took just a little more than 1 roll for this average size bath.  The wallpaper is paintable, so I painted it and the "chair rail" to match the existing trim.  

You can also see it in the first photo in the mirror reflection.  I installed it at about 48 inches or so, I like it high, since I'm kinda short (5'3" on a good day).  

Not sure of the wall color, it was here when we moved in.  
 This frame I made for the room hasn't been installed on the mirror yet.


  We are thinking about replacing the vanity top and will have to do that first so we don't risk messing up the frame.

SOO much more to do in this room, baby steps!:-)

Friday, May 20, 2011

His and Hers Office

This is our actual working office/sewingroom/craftroom/library/studyhall so it may not be perfect, but it's at least organized (don't open the closet door) and I love organization that can last more than a day! Oh and I'm sharing it with a man so it's really the best I can do. ;)

So speaking of sharing, for our "His and Her's" Office Space I wanted to represent us both. So after some thought I knew that I loved Neoclassical design, he also loves U.S. history (same time period) and we both like modern clean furnitures so I went something a little like this....


But first.
-The desk is a life savor! I love that each of us has a place to work.


-The chairs are also from IKEA and I added the "his" and "hers" to the back.


Above on the wall is a glass board (IKEA) that I use as a whipe board and calender. It's great!
-


There are also boards above each of our work space were we can tack things.
I've put up there places we've been and places we want to go, and projects I'm working on.


And no work space would be complete without baskets with cute chalk board labels.
We already had these 2 shelves so we put one on each side of the table to create our own "unit"

I just fell in love with this bunting when I saw it on Whipperberry.com and knew I wanted to make it (see below). I think it incorperates a hint of Neoclassical inspiration without going overboard


(dining room, Mt. Vernon)

Some of my inspiration the color of room and the bunting came from Mt. Vernon, MD. George Washington's home. We went there last fall and I fell in love with it because each room is painted an amazing shade of blue or green.
I have a feeling Martha W. and I would have been great friends.
So again, the use Neoclassical style and US History, combining 2 things we love!


I also love the raw fabics since I love to sew.
How-to: Take one Lloonngg piece of fabric the length of the what you want and then tie other scraps of fabric to it. I stuck with cream, whites, blues and greens.


Neoclassical wouldn't be complete without a couple of Busts!
The man and woman I found at the thrift store work great in my His and Her office.
Neoclassical also has a profound use of Symmetry
(notice the picture of the dining room above also). I also have a profound LOVE of Symmetry. I was inspired by that for our little reading/studying nook below.
And the desk area above is also rockin' the symmetry.


We love to sit here and read or study. To see how I did this wall, go HERE.
(I promise those lights are at the same height but for some reason it doesn't look that way in the picture)


This is also a little Ode to Neo C. a table with a little fluted column.


Notice when I talk about this room I say "inspired", not reproduced. I wouldn't say the room is Neoclassical, but was more or less influenced

My suggestion for doing a His/Hers space is to make a list for each of you with everything that you love- to do, colors, style, jobs, hobbies or whatever until you see common thread. Shouldn't be to hards since you're married right? You should have something in common! Once you find that thing run with it! But try to do it in a more subtle or fun way.

Oh and more Neoclassical, just because I can.

Thursday, May 19, 2011

DIY Camera Bag

I recently got a nikon slr camera and have been looking everywhere for a cute camera bag to keep it in.  Most camera bags are generally boring black, not to mention  "Nikon" or other camera brand embroidered on the bag.  Nothing says "Steal Me, I have expensive equipment inside" like announcing it on the outside of the bag! If I wanted to get a cute one already made, like from Jo Totes, I'd have to fork out mucho dinero.

Enter a little DIY!

I started with this very Cute Lunch Sack Bag from Marshall's for a mere $24!  (But Lauren, that's for lunches, you can't keep your camera in there!)  It's got this great fold over flap, and a drawstring underneath.  Not to mention great pockets on the outside front and back.  

Now I needed to add some padding to protect my camera and 2 lenses.

I got some 1" foam at Joann's, a 2x3 prepackaged foam only cost $2.  I cut foam for the bottom and the sides, and one for a divider.  Then I took some fabric I had laying around and cut it and hand sewed it round the foam.  I didn't bother covering the back side of the foam, since that will be up against the inside of the bag and not showing.  Be sure and cover the sides and top.   Easy Peasy!  


To keep the foam in place I used matching turquoise thread and hand tacked the foam in a few places through the foam and outside of the purse, you can't even see the marks they are so small. 
(You could also use sticky velcro.)


 And Voila!  Functional and cute camera bag for under $30!

Monday, May 16, 2011

Dinner this week!

Anyone wondering what's for dinner?  Start this menu any day of the week.
Here's my plan from Week #1,  since I previously posted Week #2.

 You can print the shopping list, check off the items you already have in your pantry, and write your other items in the blanks and you'll be ready for the store.  Want to be stress free this week and have the family happy? Let's Make Dinner!:-)

Thursday, May 12, 2011

Purple Petunias

OOOHH!!! I am so excited about my plants this year!  This week I got petunia plugs for uber-cheap! See these little trays? Each one had a petunia plant in it.  The tray was 8x16=128 petunias!!
And I got them for $7.  What?!! Last year at the big box store, I paid around $5 for one big wave petunia plant.  Well, not this year suckers!


 Since I got the plugs, they needed to be transplanted right away. Luckily I had a stash of peat pots and old containers that I had saved from previous years flower purchases.
(They already look more comfortable in their new apartments)
Container Gardening Tip:
I usually put AT LEAST 5 petunias in a 14" pot.  (plus greenery to flow over the sides, etc.) Those guidelines of inches to put in between each plan on the plant labels don't apply to containers, cram them in for the best look.

  The last frost date here isn't until the end of the month, so if I do have to bring them in at night it will be easier for me move small trays than large pots.  It took me an hour or 2 just to transplant these.  And there's still 1/2 tray to go!  I love my plants, but now I have to remember to water them... thanks for the rainy days rain!

Monday, May 9, 2011

Made for Mothers (Another great Handmade Towel Tutorial)

 I was excited to send some handmade items off for Mother's Day gifts this year.  This was a pretty basic sewing project.  I bought some white hand towels at Wally-world, then made  ruffles and sewed them on.    

Here's a VERY brief tutorial on my process, if you have questions, please leave me a comment.

Supplies:
dish towels
Two or three 3-3 1/2 "x36" strips of fabric (or 3"x whatever the widtch of the fabric is that comes off the bolt) for each towel
coordinating thread and white thread on the bobbin (important so you don't have thread lines on your backside, well, the towels backside I mean)
iron & ironing board


1. Cut out strips.
2.  Iron in half lengthwise, wrong side out.
3. Sew one end and then all the way down the long side, leaving other end open.
4.  Turn fabric strip right side out (reminds me of turning out a scrunchie-- remember those?)

5.  Iron strip now turned right side out flat.
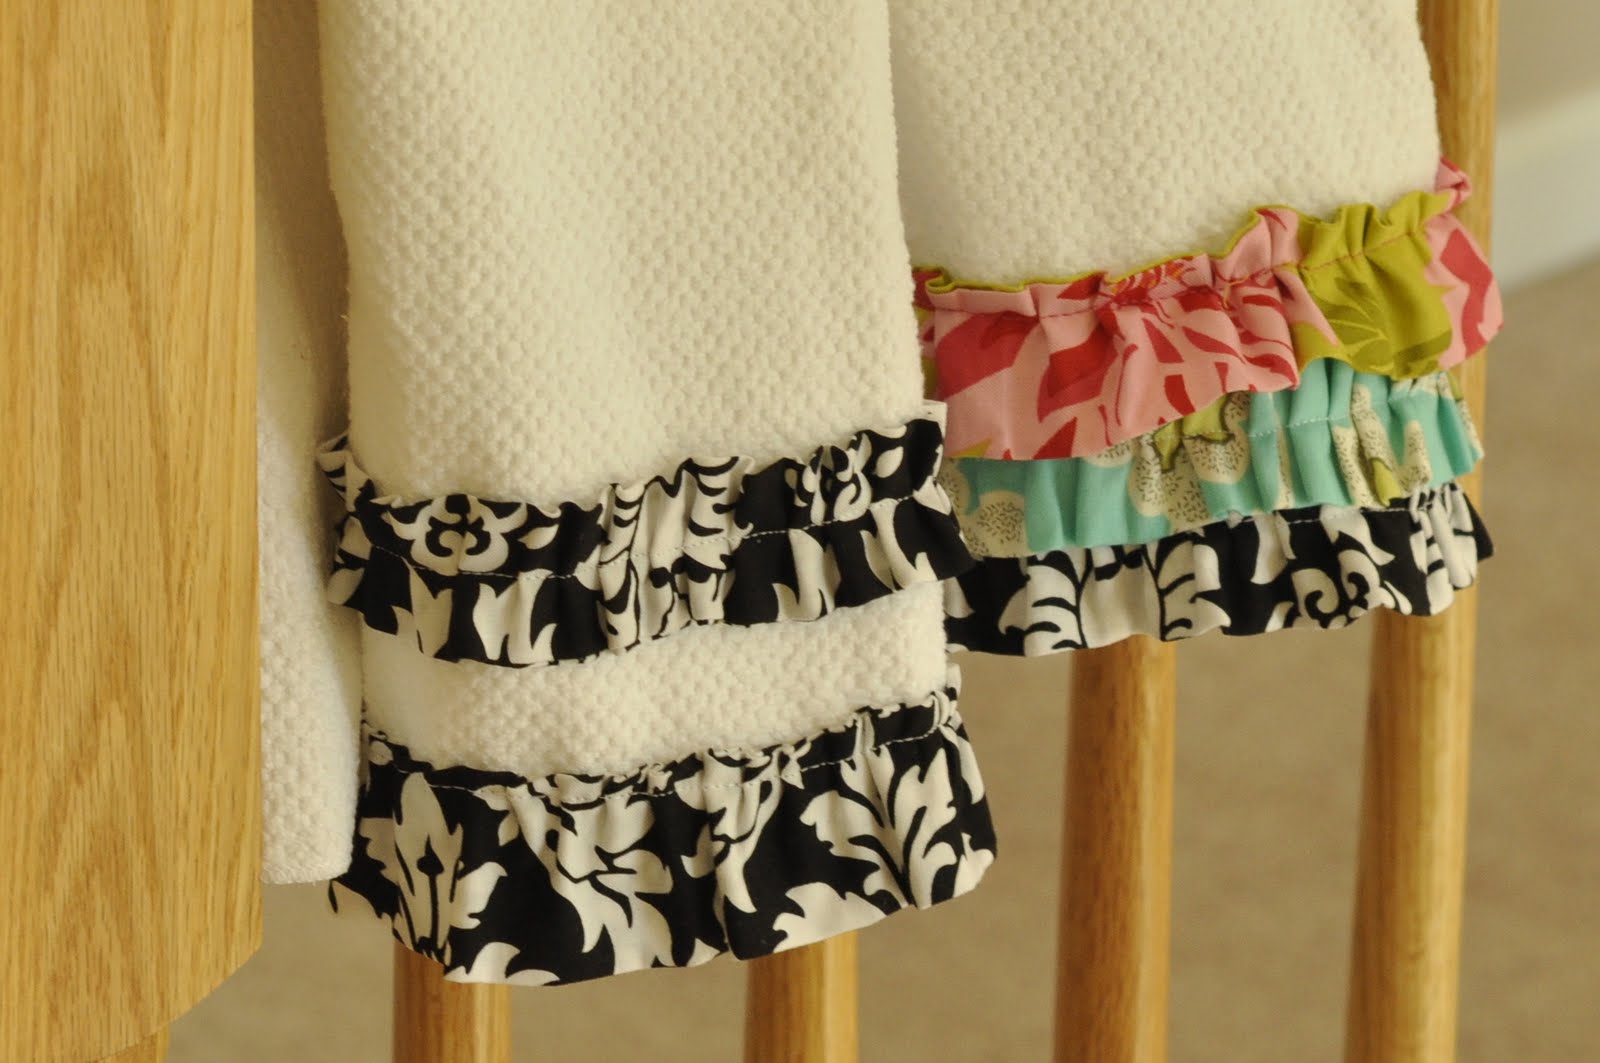
6. Pinch and pin the strip on, ruffle to taste:-)
7.  For the top ruffle I sewed it down the middle, for the bottom ruffle I sewed it on the top, so the ruffle would be hanging off the towel.
TIPster:I liked doing the strips inside out first and then turning them, so that after the towels are laundered you won't have any hems showing later.  (I mean really, who is going to iron towels after they're washed?)  Also, I usually had to cut off some of the fabric strip after I ruffled it since my strip was too long,   so then I turned the edge inside itself, and then sewed it in place, that way their won't be a hem on the side either.   (Sorry about the lack of pics describing this, I had to mail them off quickly, and am late mailing off my last set.    

Hope you all had a wonderful Mother's Day!  I sure did:-)
Related Posts Plugin for WordPress, Blogger...