We're Designers. We like to Decorate, while we Eat Chocolate.

Tuesday, August 31, 2010

Office Graphic Wall


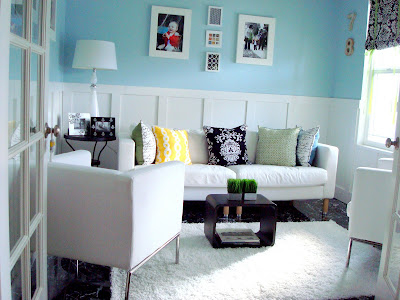
This is a wall in our office/craftroom/library!
To see the whole office go HERE.


I would have done wallpaper or paint but since this is not "my" house I had to come up with a different, less permanent way.... So after searching through stores I found this heavy duty WRAPPING PAPER! $3 a roll! It also had to be wide enough so the frames wouldn't overlap the edges.


How-To: So at the top I folded over the edge of the paper and put thumb tacks through. The fold hides the thumb tacks. It worked great, ABOVE: I've pulled out the paper so you could see.
It still needed a bit more to make the paper lay completely flat so I bought BLUE paint and PAINTED the thumb tacks and stuck them along the top and sides. Crazy I know! You can't even see them! I also put a tack on each side at the bottom.


This is a frame from IKEA, I never liked it black so I painted it white. I was lucky enough to find an un-damaged one there too.


I also found these lamps in the AS-IS at Ikea, I can't even tell that something is wrong with them. They were $2.99! Taking a page out of Laurens book I added some ruffled fabric around the bottom of the lamp shade.

We just love to sit here and read and study.
If I ever want to change out the "wallpaper" for a different color I can always go to the party store ;).

Friday, August 27, 2010

DIY Kitchen Window Treatment

Kitchen Window Before:
Here's the latest offender: the kitchen window. It actually has a decent roman shade window treatment, with a fancy pull string- but it's just so bland and boring! I love the smaller top window, but there are times when I'm making dinner that the sun just glares me right in the face and that problem needed addressing.  So, after 2 quick trips to JoAnn's for fabric and trim (armed with my 40% off coupons,  one for each), I sewed up this curtain.  This was so easy,  I simply hemmed the edges, and then folded it over to make a pocket for the rod to go through (I didn't line it, since I left the roman shade underneath for privacy, plus, when is anyone ever going to check that kind of thing, save yourself the trouble!).   Since it was just a straight square of fabric, I bunched it up and tied it with the ribbons until I got it at the height I wanted.
Kitchen Window Now:
 I chose the fabric to work with the  paint color that was here when we moved in. But, we may be staying here longer than expected, and I think I'd like to go with something a little more fun, while this is more traditional.   But hey, it works for now, and looks better than a blank window with no style, and blocks out that afternoon sun.

 P.S. Please ignore the rod, I just found something to throw it up there to see how I liked it, and haven't gotten around to changing it yet.

Tuesday, August 24, 2010

What Color is it this Week??

My 1/2 bath.   Literally  a [paint] coat of many colors.  Ha! 
Here's what I started with, the boring builder beige that's everywhere.
 I decided to paint this while my husband was out of town.  Unfortunately, he came home early... and saw my first paint color....


That's right....a lime fluorescent green.  Which would be great.... if we had decided to move to Puerto Rico instead of the East coast! 

[ My intention was to use this fun Amy Butler print as a curtain (first I made into a valence, later turned into this dress for my daughter and her Felicity doll), because the green in the fabric is exactly my wall color.  Somehow I forgot this might be better as an accent color somewhere, and not such a large surface...  ]


Needless to say, since my parents were coming to town the next week, the bathroom was immediately painted white. (Sorry no pics of that BORING white bathroom) while I took time deciding on a new color scheme.  

Then I chose a fabric for the valence from JoAnn's (on sale of course), and used it as my inspiration. Read about how I made it, the frugalista way, here.

On the wall across from the throne,  I changed out the metal flower for this square metal wall decor which is better suited to the scale of the wall  (got at Hobby Lobby ages ago).  I scored these bath towels (love!) for $7 ea. at Marshalls.   
Before:
After:


Above the throne, I got this shelf and wall art at TJ's Home Goods. The wire basket was from World Market, the potpourri from Wally World, and I rolled up two coordinating wash cloths with a bow and threw a candle in too.  

I also got this cute butterfly votive holder at Pier 1.  

At first my husband wasn't so sure about the paint color, [He refers to it as "motivation brown", isn't he sooo funny?] but once it was all put together it earned approval. If I remember correctly  the color is Cinnabon at Home Depot.

Once again, the 
Before & After:


Much better... ahh.

Sunday, August 22, 2010

Bed Pillows (Xtra Large)

Another sewing project, I know, I'm sorry. But I can't help it! I'm also sorry that I'm lacking pictures. The card on our camera got deleted before I could get them all off.I've always loved this bedding from Dwell, but didn't couldn't bring myself to spend $50 on pillow shams since I'm always changing my style there's no point. ...BUT

I saw this Dwell table cloth, exact same pattern as the shams, on Clearance for only $15! I was so excited because it was basically a 60"x104" heavy, pre-hemmed piece of fabric! I knew I could get a lot out of it!
I also found this bolt of fabric at a fabric store, $5 for the whole bolt! So I cut 2 24" squares out of each fabric. The plaid is on the back of the bird fabric.


To complicate things ;), I added a ribbon around the edges. I put it inside the 2 pieces, with the polka dots facing the bird fabric so that way I knew when I was done sewing around the edges I would turn it right side out and the polka dots would be facing the front. Does that make since. It took me a second try to figure it out and get it right!
So to sum up, after sewing a simple stitch around the 4 edges I left a little opening and turned them right side out. Stuffed them with A LOT of batting (because I made them so big) and handstitched the openings closed. Ta DA! I love them so much!
I still have a lot "Table cloth" left over and I'm thinking of maybe making a skirt!

Friday, August 20, 2010

Elephant Eyesore

Its fun to find a pal you have a lot in common with.  Stacey and I were both were ice cream girls, but coincidently got hooked on milkshakes at the same time.  We also love Cheerios.  Same goes for interior design tips.  So, here's another EASY example to freshen up your home on a budget.  For my son's 4th birthday, grandma and grandpa got him a big boy bed.  As I have yet to get him a headboard,  I hated looking at that box spring below the mattress on that cheap metal frame. I had seen this idea on Martha Stewart a while ago. Enter the coordinating fitted sheet, and say goodbye to the elephant eyesore in the room.

Before:

After:
My boy's room is a pretty simple Red/White/Blue color scheme, and I got the reversible duvet cover (minus the down comforter for the summer) with pillowcase at Ikea, the twin sized star fitted sheet at Target. 
It's not a huge transformation, but I love things looking a little more put together. 


Wednesday, August 18, 2010

Falling Water

On our vacation I was stoked (do people still say that word?) to visit Falling Water!!  It was way out in the middle of nowhere, and when I first called they told me the tours for that day were full. OH NO!!  Then my sweet and very tactful hubby told me to call back and explain my situation of only needing 1 ticket and that I was passing through the area from Harrisburg back to the midwest and could they please fit me in, and they did!!! I was so happy and relieved.
 They don't allow children under 6 on the tour, so I got dropped off to take the tour of the house, then walked on the trail to this spot for the view everyone knows it by.  You were not allowed to take photos inside the house, since they need $$ apparently to run the place.   I hadn't realized the open walk down steps and view of the water before it goes down to the water fall was visible from the living room.   FLW was way ahead of the time disguising the heaters in the furniture and keeping the illusion of the outside in, or is it inside out:-)  One of my favorite parts though was the concrete canopy over the walkway from the main house up to the guest house.  There was also an outdoor pool off the guest house, which is filled by the stream that goes down to the water fall.  If I have the chance to go back, I will take the extended tour, since there were a few rooms you don't see on the basic tour (like the kitchen the staff uses for a break room).
 The part I thought was funny is that while the cantilever balconies were bare, one had a boxed up herb garden in it, which was there to cover the skylight to the guest bathroom, which you would have been able to see down in from the 3rd balcony! ha ha!   One thing about the concrete is that it was a constant pour, and so they are constantly filling cracks, and they do have problems with  the roofs, as they are flat and not sloped. I wish I could remember everything on the tour, I completely loved it!!  The other funny thing about the house was that there was a "Mrs. Kaufmann's room, and a Mr. Kaufmann's room, the tour guide reminded us of the "I Love Lucy"show, where people still wanted to keep up appearances:-) Here are the few photos I was able to take of the outside:

This is the view where the tour starts.  to the right of the house is the front door.  Back when it was built in 1935, they had the option of putting in AC, but since it was their vacation home, they opted not to.  It made for a hot tour!

I think this is the view as I was leaving to go to the lookout point.  The tour guide pointed out that these were rhododendrons, and that when the family actually vacationed here Mrs. Kaufmann had planted lots of bulbs as well.  They still keep fresh flowers in the house every week.


This is the garden that is planted on the path that takes you to the house from the visitors center. It was quite a little walk up and down to the house, I'm glad I switched my sandals out for tennis shoes before I hopped out of the car.


Here's my kids at the visitors center. I thought they did a good job of creating it to go with the FLW style, it was hard to tell if you were indoors or outdoors.
 [My husband walked me up the visitors center, then left with the kids.  You had to pay for a grounds pass even if you wanted to view the outside of the house, so they opted to find something to do in the nearby town, which turned out to be wading in the river.]
This was a great part of our family trip for me.  When we go out west I'm going to try to make it to another one of FLW's homes, Taliesin West.

Monday, August 16, 2010

Homemade Pillow Case Bag

This was a "Craft of the Day" that I received in an email from www.marthastewart.com. I signed up for "craft of the day" "recipe of the day" "organization tip of the day" and a few other things. I love it! But my mail box gets full fast!

I remember making something like this a pre-teen, but I think this is a little more refined.
These are my lonely pillow cases. You can also find discount ones at TJ Maxx or the clearance section at any home store. The one I use bellow I've had since I was little and now I have a new purpose for it!
Lay it out and cut about an 1/4 inch of the bottom where it closes and then cut at a diagonal.
Open it up to make a triangle and fold the 2 sides of the triangle in twice, pin and hem

Next fold back in half, right side out and stick one inside of the other

Lining up the bottom edges, pin and sew in front where the fabric overlap. Repeat on other side.
Turn the fabric inside out and hem the cut bottom close.


After, turn back right side out. To finish you can tie it closed or sew ribbon or toole like I did at the top to tie closeI use mine to take books to library and I've gotten a lot of compliments! People don't believe it when I tell them it's an old lonely pillow case!


Sunday, August 15, 2010

D.I.Y. Wainscotting

I realized the other day that I've never posted these panels that my husband and I built in our last house about 4 years ago.
It's quite common now, people are doing everywhere now and it's really easy do!
So sorry that I don't have pictures of the "how to" but it's so easy I can explain it and you should get the jest.

1- Paint the wall 3 to 4 ft up white OR you could paint it a light beige if you wanted.
2- Take off the bottom baseboards if you don't already have baseboards that are an inch thick
3- You can buy 6x12 boards at Home Depot or Lowes and paint them white.
4- Create the "panels" above by nailing the bottom baseboards first. Then you can decide how far apart you want the panels to be. I think we did 18" apart.
5-Next top it off with another one more board

The end!
or you could put a shelf on top of the top one too!


Wednesday, August 11, 2010

Laundry/ Mudroom DIY Locker Update

My Laundry room is coming right along.  Here is a view of the west wall:

Before:
During:

You can read all about how my hubby and I built the lockers and where to get the
After:

See more updates like custom diy locker cushions here and the opposite chalkboard wall, and wall stencil. 

It's hard to see but there is bead board on the back, and we added the molding to the top.  They were around $200 for the pair, that's better than $200/ea at pottery barn!
They need to be accessorized, but first I got the lined baskets on 50% off at Michaels, the seat cushions came in a 4pk for $25 at Marshalls- love that place!  I made name tags for the baskets out of scrapbook paper and rub ons, and attached them with a big metal paperclip.

Monday, August 9, 2010

Head Boards..What should I do?

So currently my husband and I are knee deep in the middle of bathroom remodel for my mother in law. I've taken a break to do this while he muds the ceiling, rough I know. It will be amazing when it's finished, a completely different bath! She deserves it!

But for the moment I want to switch gears and post a few head board ideas I've been toying with for my master bedroom. We currently don't have one and I want to make one. I need something simple that I can either leave or won't take up to much room in a truck....of course that's never stopped me before.... so what do you think?

This is a piece of wall paper that has been cut along the graphic pattern. I like it! Very clever.

This is a trellis that has been painted and hung vertical.

This is an old door, I actually have an old door so this idea is top of my list.... I might tweak it a little bit. You could also just make this with lumber from the home improvement store.

Ok, this is just an idea I like instead of doing a bed skirt. Take a fitted sheet and wrap it around your box spring for a more tailored look.
This I thought was just fun. A ladder as a side table! Great for a guest room.
Thanks for taking a moment to read..Keep checking back for more posts and for the final result of the Master Bath remodel!
Related Posts Plugin for WordPress, Blogger...